In this post, my goal is to use the Array in a simple project so that its use be clear, but keep in mind that this post is a continuation of the previous three posts, so if you haven’t read them, what you read here may be confusing. So read this post first, then this post, and if you think you need to know more about the method, read this post. I have uploaded the project file to Github according to the process I have had so far, you can download it from this link or open it with Github desktop software, which is better because you can get the next updates easily. The name of the file is SpeedControlArray, which is located in the Scenes folder.
But what is the story? In this project, I am going to show how to write codes that will allow you to connect as many objects as you need in the Unity UI, so that you can make changes to them, such as changing their color, and you can also determine the speed and direction of their rotation.
First, in the Assets tab, you should create a new script and name it SpeedControl or whatever you want, and then open it in Visual Studio and add the following three variables.
using System.Collections;
using System.Collections.Generic;
using UnityEngine;
public class speedcntltest : MonoBehaviour
{
public GameObject rotatingFans;
public Color colorField;
public float fanRotationSpeed;
void Start()
{
}
void Update()
{
}
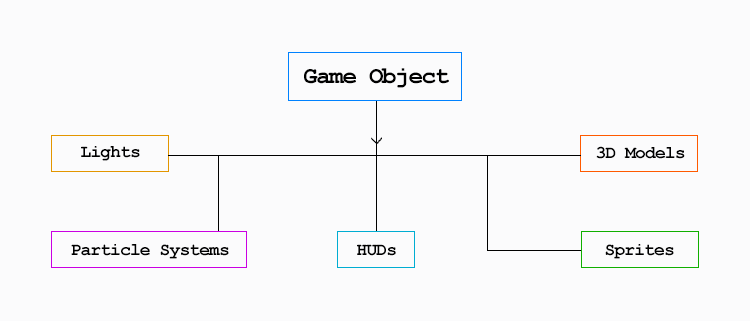
}You use the first variable to control the rotation of the fan model. This is because almost everything in the Unity scene is a GameObject, so to access the component that controls the rotation of the fan model, you should put the name of the GameObject class and then the variable name. What I’m saying is that everything in the Unity scene is a GameObject, which you can consider similar to System.Object in the .NET Framework, where everything comes from System.Object. In the Unity scene, GameObject is a base class for all objects. In the diagram below, the names of some of the most important Unity objects obtained from the GameObject class are specified, of course there are more of them:
Line number eight is going to add a color picker to the Unity UI, so that you can use it to choose the color that I explained in the previous post. The ninth line is also a float variable with which you will be able to control the fan rotation speed. All three of these variables have a public access type so that you can access them in the Unity UI.
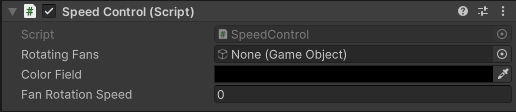
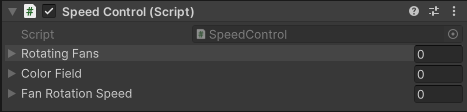
Save here and return to Unity. Create a GameObject in the Hierarchy tab and attach the script to it. The result should be similar to the image below:
Connect the fan model to the Rotating Fans field and then add the following three lines to the Update method:
using System.Collections;
using System.Collections.Generic;
using UnityEngine;

public class speedcntltest : MonoBehaviour
{
    public GameObject rotatingFans;
    public Color colorField;
    public float fanRotationSpeed;

    void Start()
    {

    }

    void Update()
    {
        var myFanRenderer = rotatingFans.GetComponent<Renderer>();
        myFanRenderer.material.SetColor("_Color", colorField);
        rotatingFans.transform.Rotate(0.0f, 0.0f, fanRotationSpeed);
    }
}
The reason why you should add these three lines to Update and not to the Start method is that you can still control the color and rotation after pressing the Play button in Unity. In addition, the third line must be in the Update method in order for the rotation to continue, otherwise, if you put it in Start, the value you set for it, for example, 60 degrees, will rotate before the first frame of execution and then it will remain fixed.
I explained about the two lines 18 and 19 in the first and second posts that their work is color change. In the third line, you tell the rotation variable in the transform component of the model that you have connected to our script in Unity to use the value entered in the Fan Rotation Speed for z-axis rotation, that is, the same value that you can set in the Unity UI. Save the file and go back to Unity and press the Play button.
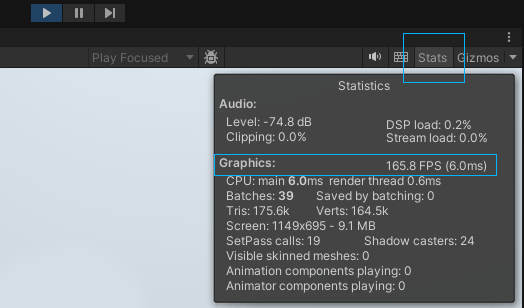
The only thing that is a bit strange is the rotation speed of our model, which may be very fast on your PC even if the number is set to one. The reason is that here the rotation speed is not based on real time, for example one degree per second, but based on the power of the graphics card. It means that it is frame rate dependent, the more frames your graphics card can display in one second after pressing the Play button, the fan rotation speed will increase accordingly. You can see this by activating the Stats option in the Game window.
To solve it, our rotation number must be multiplied by something called “Time.deltaTime”. What is this job now? Its job is to calculate how much time has passed from the previous frame to the current frame based on seconds. This number is usually less than zero and is not constant, and the more powerful the graphics card is, the smaller the number will be. If you multiply this number by the amount of rotation, for example, one degree, if our model rotates one degree in one second, the amount of rotation for each frame will be determined.
rotatingFans.transform.Rotate(0.0f, 0.0f, fanRotationSpeed * Time.deltaTime);So far, you have done the necessary work for one model, but what about more than one? One way is to add to the number of code lines, for example, now that you have five lines, add 15 lines for the remaining three models and change only the names. What if there are more models? Well, this method is obviously not practical. This is where Array comes in. Its use is that instead of one thing, a number of something (a collection of similar types of data) can be stored in it, for example, instead of a rotation speed, we can store a number of different rotation speeds in it, as simple as that. To change the variables that you have now to an array type, after determining the type of the variable, put two open and closed brackets, like the example below:
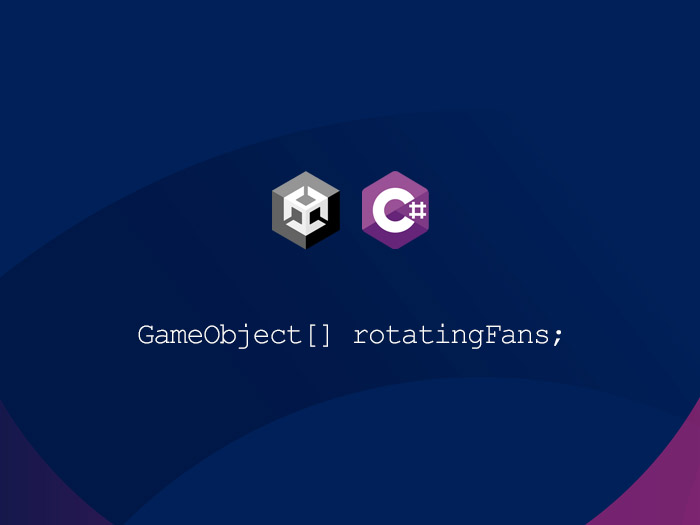
public GameObject[] rotatingFans;
public Color[] colorField;
public float[] fanRotationSpeed;
With this, instead of 12 lines, you only have three lines to define the variables of the four fan models, but now if you look carefully, you will see that the lines inside Update show errors. The reason is that their variable type is different from the above variables. I think you guessed right, you have to add two brackets to them, but after adding the brackets, a small error remains under them. If, for example, you put zero in the brackets of these three lines 18, 19, and 20, the problem will be solved, but why? The reason is that when you define an array variable, for example, of the GameObject type, your variable stores the name of each model in the order we attributed to it. For example, it places the name of the first model in position number zero (always the first position of the array starts with the number zero) and the name of the second model in position number one and the rest in the same way. Now, to refer to the model stored in the array, you should write the position number inside the brackets. That’s why Visual Studio doesn’t give an error when you put zero in the brackets.
var myFanRenderer = rotatingFans[0].GetComponent<Renderer>();
myFanRenderer.material.SetColor("_Color", colorField[0]);
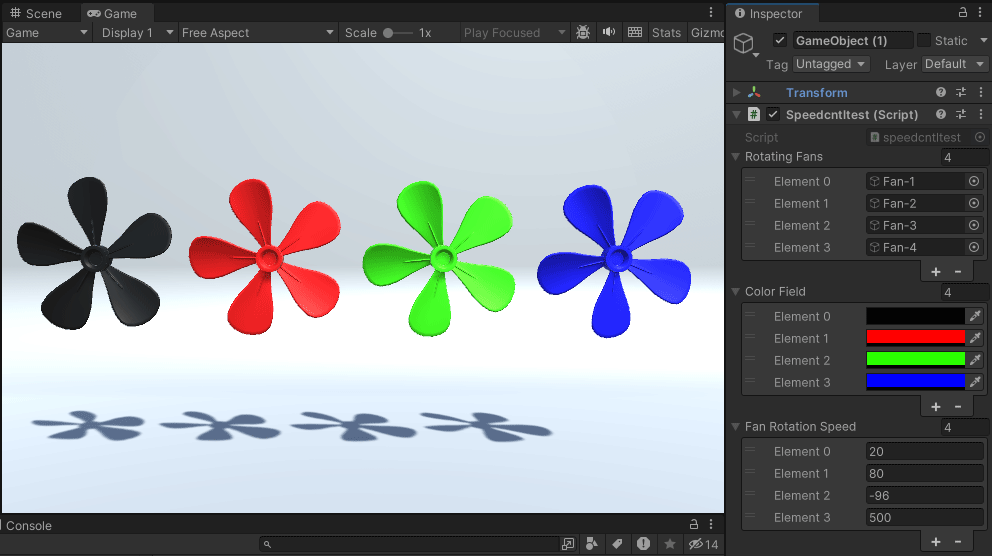
rotatingFans[0].transform.Rotate(0.0f, 0.0f, fanRotationSpeed[0]*Time.deltaTime);Save and return to Unity. You can see that the variables change and there is a zero value in front of each one, which basically determines the number of positions. Because you have four models, four color pickers and four rotation speeds, give all three four.
After changing the value from zero to four, it creates four positions for each variable
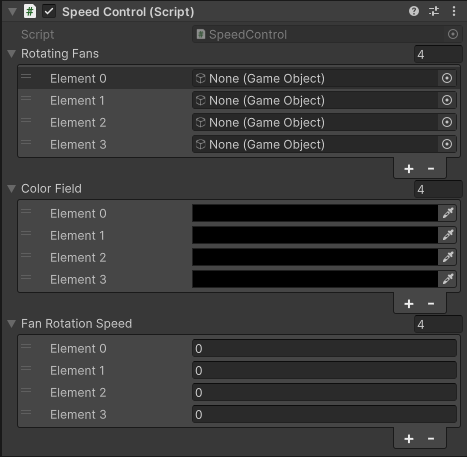
In this step, connect the fan models to the Rotating Fans fields and set the desired colors and rotation speed values for each one. Click the Play button. You can see that only one of the fans is working. One way is to copy the lines like the example below and only change the numbers of the positions.
void Update()
{
    var myFanRendererA = rotatingFans[0].GetComponent<Renderer>();
    myFanRendererA.material.SetColor("_Color", colorField[0]);
    rotatingFans[0].transform.Rotate(0.0f, 0.0f, fanRotationSpeed[0] * Time.deltaTime);

    var myFanRendererB = rotatingFans[1].GetComponent<Renderer>();
    myFanRendererB.material.SetColor("_Color", colorField[1]);
    rotatingFans[1].transform.Rotate(0.0f, 0.0f, fanRotationSpeed[1] * Time.deltaTime);

    var myFanRendererC = rotatingFans[2].GetComponent<Renderer>();
    myFanRendererC.material.SetColor("_Color", colorField[2]);
    rotatingFans[2].transform.Rotate(0.0f, 0.0f, fanRotationSpeed[2] * Time.deltaTime);

    var myFanRendererD = rotatingFans[3].GetComponent<Renderer>();
    myFanRendererD.material.SetColor("_Color", colorField[3]);
    rotatingFans[3].transform.Rotate(0.0f, 0.0f, fanRotationSpeed[3] * Time.deltaTime);
}
Although it is not a good way and our three lines of code increased to 12 lines, but you can see that it works. But what is the better way? A better way is to use a feature called a For Loop, which executes a certain number of lines of code inside itself continuously. Read the full explanation about loops here. Now change the codes like the example below:
void Update()
{
    for (int i = 0; i < rotatingFans.Length; i++)
    {
        var myFanRenderer = rotatingFans[i].GetComponent<Renderer>();
        myFanRenderer.material.SetColor("_Color", colorField[i]);
        rotatingFans[i].transform.Rotate(0.0f, 0.0f, fanRotationSpeed[i] * Time.deltaTime, Space.Self);
    }
}
I think you have read the explanation about the loops, so now I will just say one thing about the above codes. In the three lines 20, 21, and 22, inside the brackets in front of the arrays, this time instead of the position number, I put the variable “i”, which I defined as a counter inside the loop brackets. With this, its value changes every time the loop is executed, and the codes inside the loop are applied to the next GameObject. For example, the first time the loop is executed, because the value of the counter is zero, then the color change and the determination of the rotation speed are applied to the number one fan model in the Unity UI. This is because the name of fan model number one is stored in position number zero. Then the counter updates itself and its value changes from zero to one. This time, it is the turn of the number two model in the number one position. This continues until the last model is connected to your script.