This post is related to the previous post about changing the color of an object, so be sure to read it first because I explained things there that I will not explain here in order not to repeat them. Another point is to have the GitHub desktop software on your PC and download the project that I explain here from this link. The final result of what I am going to explain here is saved in the scene file called ColorChangeWithButtonScript in Assets > Scenes, which you can use for practice.
In this post, as the title suggests, you are going to use a few lines of simple code to change the color of a mug by pressing a button in the scene and creating a color picker for determining the color, where you can choose the color before it.
If I want to say in order:
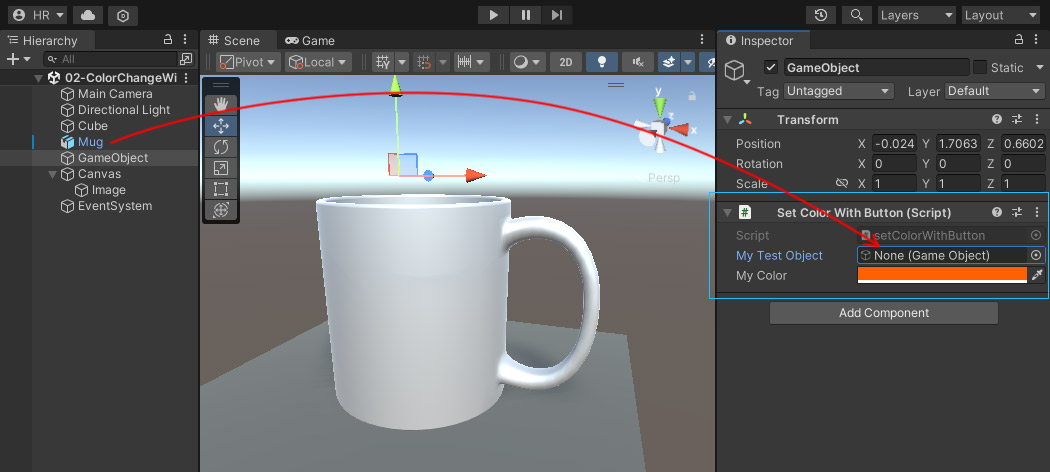
1- In the Assets tab, create a C# script and set a desired name for it. I chose setColorWithButton. Now open it in Visual Studio by double-clicking on the script
2- Add these two lines. The first line defines a public variable named myTestObject that you can connect the mug model to it. After “public”, I added the GameObject class to say that what is supposed to be connected to this variable in Unity is a GameObject and to be able to access some things related to the model that you can change later.
using System.Collections;
using System.Collections.Generic;
using UnityEngine;

public class setColorWithButton : MonoBehaviour
{
    public GameObject myTestObject;
    public Color myColor;

    public void myColorChanger()
    {
        var myRenderer = myTestObject.GetComponent<Renderer>();
        myRenderer.material.SetColor("_Color", myColor);
    }
}
In the next line, you defined a variable named myColor with public access so that you can see it inside Unity. What “Color” does is that it allows you to determine a desired color in Unity, which is called Color Constructor, and at the same time, it saves the color based on RGBA, where the first three letters are for red, green, and blue, and A is the first letter for Alpha which determines the level of transparency.
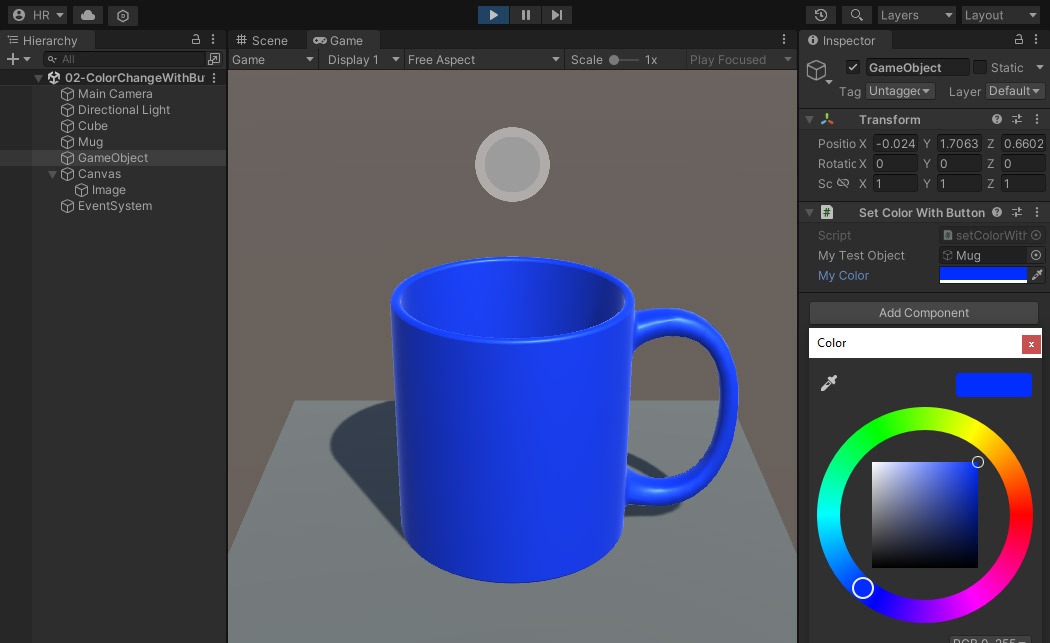
3- Save here and go back to Unity, create a GameObject and attach the script to it. You can see that you have a field to connect the model and a color picker to determine the color
4- Connect the mug model to My Test Object and return to Visual Studio
5- Define a public method called myColorChanger. See here about the method and read the previous post about “void” which I explained with an example.
using System.Collections;
using System.Collections.Generic;
using UnityEngine;

public class setColorWithButton : MonoBehaviour
{
    public GameObject myTestObject;
    public Color myColor;

    public void myColorChanger()
    {
        var myRenderer = myTestObject.GetComponent<Renderer>();
        myRenderer.material.SetColor("_Color", myColor);
    }
}
6- Add the following two lines to the method, which are exactly the same last two lines that I used in the previous post, the explanation is also there.
using System.Collections;
using System.Collections.Generic;
using UnityEngine;

public class setColorWithButton : MonoBehaviour
{
    public GameObject myTestObject;
    public Color myColor;

    public void myColorChanger()
    {
        var myRenderer = myTestObject.GetComponent<Renderer>();
        myRenderer.material.SetColor("_Color", myColor);
    }
}
7- Save the file and return to Unity
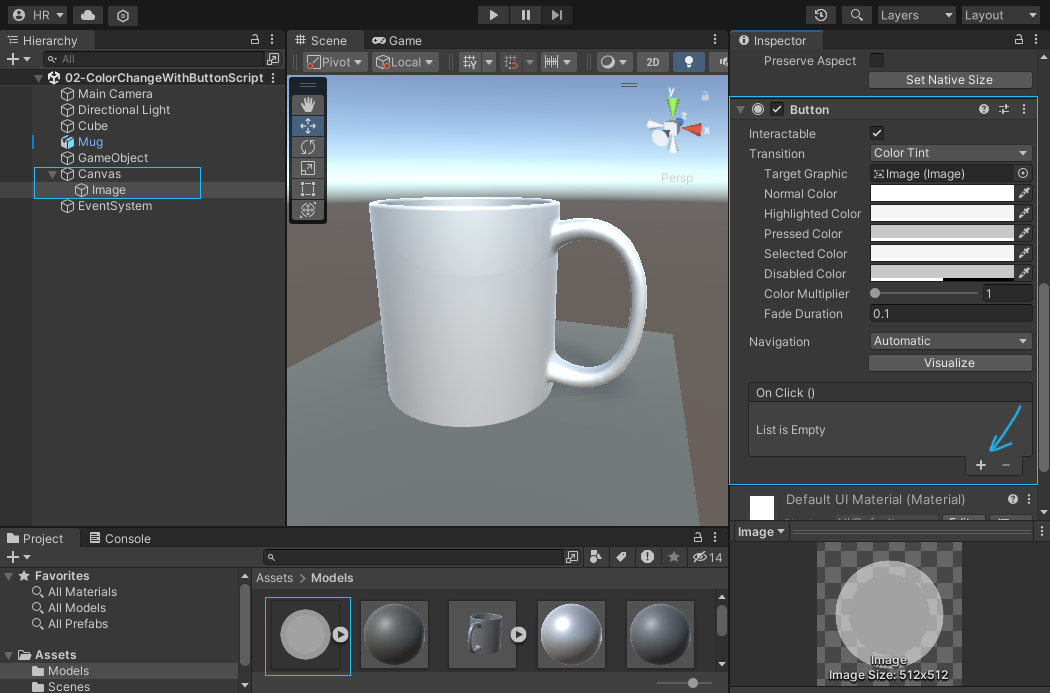
8- Create a UI > Image that you want to use as a button. There is also a simple circular image in the project files that you can drag and drop in the Source Image field of the Inspector tab.
9- As the Image is selected, click on the Add Component button at the bottom of the Inspector tab and add a Button, and then click on the + sign in On Click.
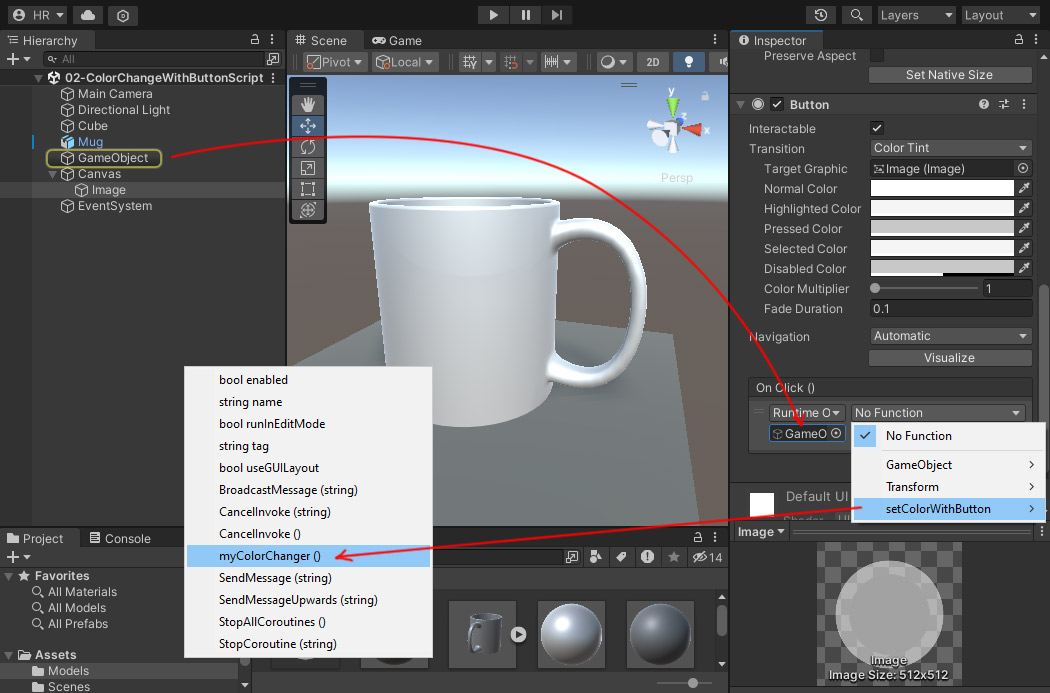
10- Now take the GameObject from the Hierarchy tab and drop it in the “None (Object)” field until it is connected
11- Click on “No Function” and select the myColorChanger method from the setColorWithButton class according to the below image
With this, whenever you click on the image of the button, the myColorChanger method is executed, which contains codes to change the color of the model that you attached to the GameObject, which is the mug model.
12- Select the GameObject from the Inspector tab and select a desired color through My Color and then press the play button. After running, by clicking on the button, the color of the mug should change to the selected color.